Friday, November 30, 2012

Finished Sampler

As I mentioned yesterday, I finished the wedding ring sampler! I feel like this one has been a long time coming. It was never intended to be anything more than a 'test' for a template set, but it definitely became more than that. But because it wasn't considered a 'real' project, its never taken top priority - it mostly sat in a pile of stuff I didn't know what to do with. But it's done now!

I finished the binding last night. Isn't hand stitched binding neurotically delicious??


I love the quilting. It's certainly not perfect, but it makes me feel like I've got a good start on figuring out FMQ.


My favorite section is the wood grain! Courtesy of Angela Walters!


New things I learned during this process: piecing curves(!), using templates, free motion quilting, bias binding, and inside corners (which did NOT turn out all that great... apparently you have to plan ahead for those kinds of things for the front of the binding and the back to work well together!)

So I think this turned out to be a pretty fun accidental project!


Thursday, November 29, 2012

What I did last night

I've said before that I do most of my quilting at night, so that explains the crusty-bad-lighting pictures. I apologize!

Last night I was working on several things, and actually made pretty good progress on two projects, and finished a third! Woot woot!

First, I finished quilting the top of the blue quilt. I'm going to wait to show it to you until it's finished, because the quilting of this one is going to tell a lot of the "story" of the quilt. But here is a teaser of some of the scraps. ;-)


I also started quilting my Grandfather's quilt - the red and gray one. It is VERY different machine quilting a "real" sized quilt than it is working on a small sandwich or something. It's going to take some figuring, especially with my current setup. I'll save that for another post. It's a good start though.


After my shoulders had had too much of sitting at the machine, I hand stitched the binding on the yellow sampler. Which didn't get finished over Thanksgiving (big surprise...) so that one is officially done!


Yay for productivity!


Tuesday, November 27, 2012

More peeking

This is a quilt that I'm working on, still in the design phase, but I thought chain pieced strips looked fun, so here they are!


Sunday, November 25, 2012

Stash-tastic Sunday

Here are some of the fabrics I've acquired in the past week or so. You can never have enough fabric!!

Denyse Schmidt - this is the first of her stuff that I've gotten from Joann's. It was during the Black Friday sale, so I couldn't say no!


From one of my LQSs, some Michael Miller "Out to Sea" and "Shore Thing".


And finally... Cuzco!!! I feel like I've been waiting for this line forever! I'd like to get some more, I'm thinking about doing a Swoon in these fabrics. I love them!


What have you been hoarding lately? Any new lines out that you're excited about?

Saturday, November 24, 2012

Sneak peek!

Here is a little sneak peek of what's going on in the sewing room...

Friday, November 23, 2012

Nightshade

I hope everyone has had a good Thanksgiving!

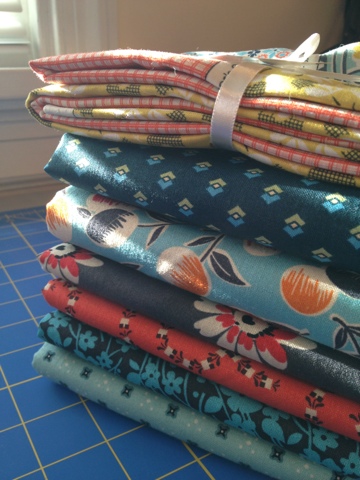
After putting the binding on the sampler the other night, I felt like I was kind of on a roll. I decided to make an eye mask. If you haven't noticed, I do most of my quilting  late at night, which means that I end up sleeping long after the sun has come up. After I painted my room, I took down the blackout curtains - because face it, that's not cute. I had an old eye mask that I couldn't find, so i decided to make a new one. I happened to have some fq's of Nightshade by Tula Pink on hand, and that was perfect. :-)


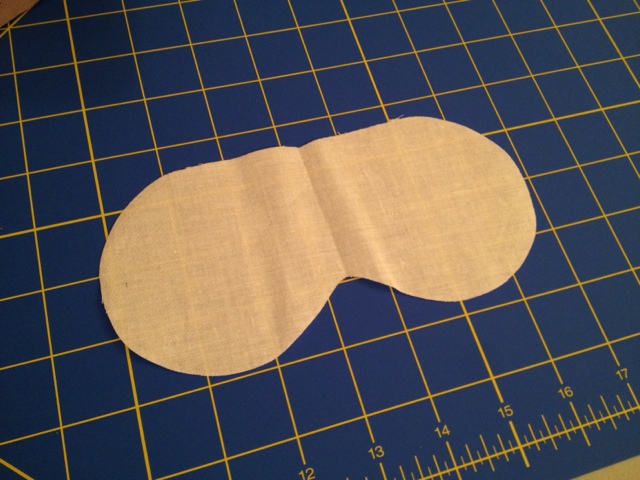
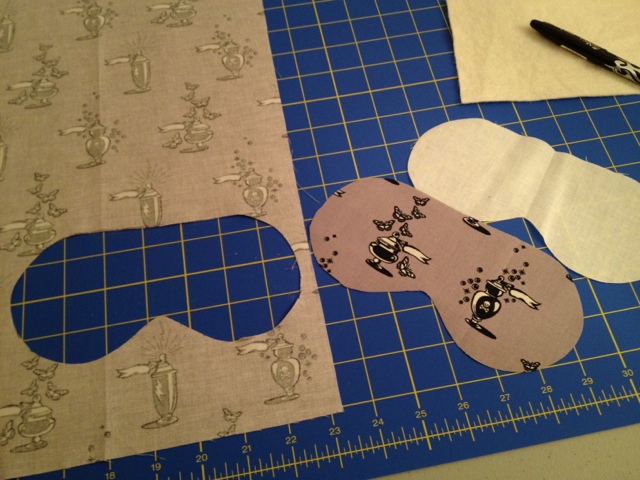
I've never done this before (like usual...) so I just drew the general shape I was going for on a piece of muslin. I used the muslin to trace the shape onto the fabric, fussy cutting both prints.


I cut some layers of batting and blackout fabric as well, and layered everything up with the right sides of the prints together on top. Though in this picture, I haven't put the light purple print on yet...


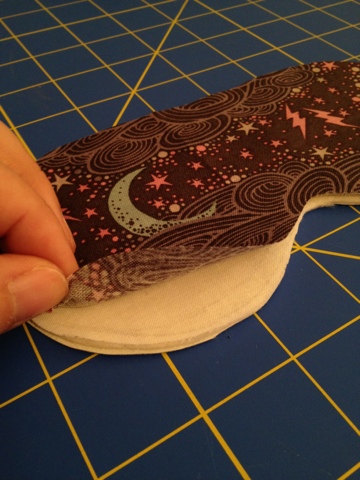
Stitch around the top and bottom, leaving about an inch and a half or so open on BOTH ends. Turn it right side out. Mutter profanities as you do so.


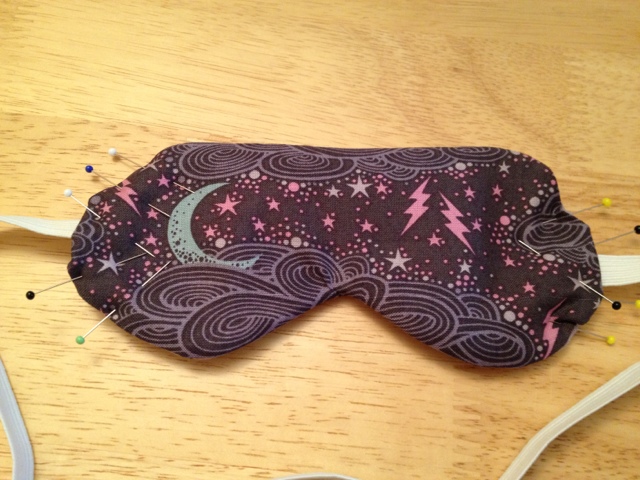
Once this is done, take a length of elastic and measure it around your head while holding the mask up to your eyes.


Put each end of the elastic inside the open sides, turn the edges in to *sort of* match the edges that are already stitched. Pin like crazy. This part will be frustrating, just so you know. I ended up trimming the sides of the batting layer so that there was less to deal with when turning the sides in by hand.


Stitch again around the whole thing, securing the elastic and closing the sides. All done!


The finished product is nothing to write home about - the stitching is not straight, the pinned sides are not as smooth as I'd like, and where the elastic goes in the sides are not even! There were actually several things that I would do a little differently if I do this again;

~ I think I would go ahead and pin and stitch the elastic to the sides during the FIRST round of stitching (carefully putting the elastic in between the layers to make sure I don't stitch over more than just the ends).
~ That would leave the TOP open to turn it right side out, which would be much easier to turn in and stitch.
~ I might consider putting more batting in, to make it fluffier, or using minky or something for the side of the mask that goes towards the face. Or maybe that would be too hot?

Let me know if you've done something like this without any pattern/direction, and how it went!


Wednesday, November 21, 2012

Bias Binding

After quilting my wedding ring sample, I decided to go ahead and bind it so it wouldn't be considered a UFO anymore. I've never done bias binding before, and I'd never bound a curvy quilt before either, but I know they go hand in hand.

I cut off the extra backing and batting off from around the blocks (carefully!) with a small rotary cutter, and then I just took some of the left over background fabric and cut it at a 45 degree angle. It's definitely a lot different to press and sew this binding, but I just went for it. It came out ok, but I definitely need more practice for those inside corners.

I still need to hand stitch the back of the binding, but I figure I can do that over the holiday, when I'm spending time with family instead of in the sewing room!


Tuesday, November 20, 2012

Practicing

After I basted the gray and red quilt, I decided that I needed to practice some more FMQ before undertaking the quilting on that quilt (which is going to be a gift, so I'd like it to be marginally presentable...)

I pulled out a practice run of a double wedding ring pattern that I was trying out, and used each of the sections to quilt a different pattern. I tried to free motion some outline quilting in the yellow parts... that didn't work out so great... But the rest of it came out pretty well.

I have to say, it was way fun!


We'll see how I feel after I've quilted all 3,250 square inches of the gray and red quilt...

Monday, November 19, 2012

Crawling on the floor

I spent this evening getting the gray quilt ready for quilting! I pieced the back - where I ended up not using the HSTs. I was having so much fun rearranging them that I decided to save them for another project. Luckily, I had enough of the backing fabric that I was able to use it without piecing anything else in.

I basted the quilt by taping to the floor by layers from the backing up to the top, then pinning at 6-ish inch intervals.


Charlotte helped. She's cute.


Pinning like it's my job.


Yay painter's tape!


All done, and ready for quilting!!


Saturday, November 17, 2012

It's like a game :-)

I've been working a lot since vacation, so I haven't had time to sew. But I HAVE had a little time to rearrange my HSTs on the design wall, trying to pick out a design for the quilt back.


Friday, November 16, 2012

Backing Up

I cut the corners off the blocks for my gray and red quilt, and I was left with this:


A pile of very small scrappy triangles. I hate wasting fabric, and I love the look of pieced quilt backs. So Those little triangles got chain pieced -


Into a stack of HSTs.


Once these are trimmed down, I'll put them with the backing fabric I got (which was a hunt!) and see what happens!

Wednesday, November 14, 2012

Top done!

I spent yesterday enjoying my second to last day of staycation by finishing the quilt top! It really didn't take me very long, the part that seems to take the longest is pressing, which is NOT my favorite part of this process. But I got all 130 blocks pressed, placed, and pieced.

These blocks...


Became these...


Which got put up on the design wall. I used Kona Steel for the background, and five different Kona reds for the blocks (Red, Rich Red, Lipstick, Poppy, and one more I can't remember...) The whole quilt wouldn't fit on the wall all together, so I placed the top half and then pieced the first few rows so I could move up the blocks and place the last few rows.


You can see in this picture that I marked my rows with little scraps of fabric with numbers written on them in sharpie and pinned to the first block of each row.


 Here it is! Pieced and pressed, all in a couple episodes of Downton Abbey :-)


Monday, November 12, 2012

Progress...

Just keep pressing, just keep pressing...

Sunday, November 11, 2012

Breaking in Bridget

I'm currently working on Bridget's inaugural project. Nothing too difficult, a lap quilt with very simple blocks. It's a good way to get to know her. Learn by doing!

Updates as progress is made!